Live Chat With A Scar Expert
A photo of the best scar cream scar protocol kit creams and cleanser

Why C-Section Scars Need Special Care

Even when the stitches are out, a C-section incision faces challenges that ordinary cuts do not. Understanding these differences is the first step to treating them effectively.

  • Tension & Incision Geometry – The horizontal cut sits where the abdomen stretches daily; constant tension can widen or thicken the scar.
  • Post-Partum Hormonal Factors – Shifting estrogen and cortisol levels can slow collagen remodeling, making scars more stubborn.
  • Melanin & Hyperpigmentation Risk – Increased pigment activity after pregnancy can leave the scar noticeably darker than the surrounding skin.
Modal Showing C-Section Scars Need Special Care

How Scar Protocol™ Works

Your scars’ needs change over time, so a single cream can only go so far. Our 5-Phase approach delivers the right ingredient at the right moment:

  • Phase I – Clean & Calm (Days 0 – 14) Immediately after your incision is cleared for cleansing, a pH-balanced wash lifts crust and residue without disturbing stitches. A lightweight aloe-vitamin E barrier cream then locks in moisture, calms itching, and primes the scar for silicone therapy.
  • Phase II – Silicone Seal (Weeks 2 – 6) Once the outer layer has closed, you’ll switch to a self-adhesive, medical-grade silicone sheet, which should be worn for at least 12 hours a day. Silicone provides an occlusive “microclimate” that flattens raised tissue, balances collagen production, and protects against friction from waistbands.
  • Phase III – Massage & Brighten (Month 2) At four to six weeks, collagen is reorganizing, and the scar may feel firm. A niacinamide- and snail-mucin serum paired with five minutes of circular massage softens adhesions and begins addressing early pigment changes, setting the foundation for a flatter, lighter line.
  • Phase IV – LED Red-Light Therapy (Months 3 – 4) During mid-remodeling, a rechargeable 630 nm LED patch is applied three times a week for 20 minutes each time. Clinical studies show that red-light therapy can reduce blood-vessel visibility by up to 40 percent, rapidly reducing redness while stimulating the production of healthy collagen.
  • Phase V – Retinol Refinement (Months 4 – 6) As the scar matures, low-dose retinol promotes gentle cell turnover and smooth texture while fading any remaining discoloration. By the end of Month 6, most users see the scar lie flush with the surrounding skin and match their natural tone.

Built-In Technology Advantage

No two scar products are the same, and the strength of their ingredients matters. Scar Protocol™ combines surgeon-grade silicone, clinical-strength LED, and dermatologist-approved actives in one kit—so you don’t have to try multiple brands or guess at dosages.

  • Medical-Grade Silicone vs. Drugstore Gels – Thicker, self-adhesive sheets stay in place for 12 hours, delivering consistent pressure.
  • Wearable LED Patch – Hands-free, timed sessions remove the guesswork from light therapy.
  • Expert-Formulated Creams – Each phase is pH-matched and free of parabens, fragrances, and dyes.

The Scar Protocol™ Advantage

Scar Protocol™ System

Five targeted phases matched to the biology of C-section healing

Medical-grade silicone sheets + antioxidant serums

Built-in LED light patch (Phase IV) to shrink redness

Developed and used by board-certified plastic surgeons

Ordinary Creams

One-size-fits-all formula

Basic moisturizers only

No technology component

Drug-store over-the-counter

Your Scar’s 6-Month Healing Journey

Healing takes time, but each phase brings visible progress. Track the changes as your scar softens, fades, and blends over time.

  • Month 0 – Baseline: Scar looks tight, raised, and pink.
  • Month 2 – Flattening Stage: Edges soften; itching subsides.
  • Month 4 – Color-Fade Stage: Redness lightens; skin feels smoother.
  • Month 6 – Texture-Smooth Stage: Scar blends with surrounding skin in height and tone.

How to Use & Quick-Start Checklist

Setting aside just a few minutes a day is all it takes to keep your scar on the right path. Follow the easy steps, and you will notice the scar fading without any extra trouble.

  • Begin Phase I immediately after clearance from your obstetrician or surgeon. Use the gentle cleanser and hydrating gel on the healed incision to calm fresh tissue.
  • Transition to Phase II at the two-week mark. Place the medical-grade silicone sheet against the scar and secure it with high-waist underwear or a support band for continuous, even pressure.
  • Consult the tracker card included in every kit. When the calendar section shifts to the next color block, move confidently to the subsequent phase.
  • Rely on color-coding to stay organized. Each bottle, patch, and sheet is uniquely labeled, so you never have to second-guess which product comes next.

Phase 1

Month 1

Phase 1 begins with intense moisturization and healing with two creams that include aloe vera and vitamin E. During the first phase, these creams will help deeply clean the scar, prepare it for healing, and minimize inflammation.

Buy now

Phase 2

Month 2-3

Phase 2 helps to strip away the build-up of dead skin or damaged tissue through a cream that contains potent ingredients like allantoin, glycerin, and aloe. It focuses on keeping the scar moisturized to promote healthy skin regeneration.

Buy now

Phase 3

Month 4-5

Phase 3 helps to smooth down any raised areas of the scar with a cream containing purified snail mucin. This snail mucin can help ease raised locations and create smooth, stunning skin while eliminating residual redness.

Buy now

Phase 4

Month 6-9

Phase 4 is another preparation stage that uses ingredients like coconut oil, tocopherol, and salix alba. This cream helps ensure the scar is ready for the final step of the treatment and the skin is healthy.

Buy now

Phase 5

Month 10-12

Once you reach phase 5, your scar may appear healed on the surface but still requires treatment for the deeper layers. Phase 5 includes a cream that contains retinol and vitamin A to heal the skin below the surface and provide a complete transformation.

Buy now

FAQs

Is Scar Protocol™ safe while breastfeeding?
Can I start if my C-section was six months ago?
Does insurance cover scar-care kits?

Conclusion

Scar Protocol offers the entire treatment in a package, or you can buy the products individually. We offer a 90-day guarantee or your money back! You can transform your scars and eliminate their appearance for healthy, beautiful skin and results you can enjoy.

Buy Now

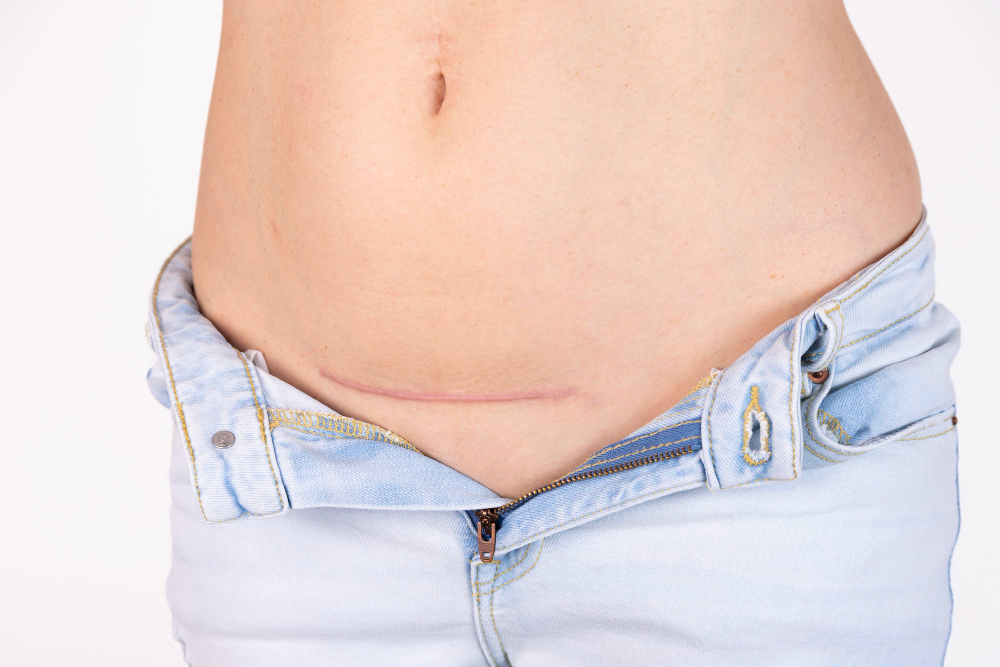
Get your free scar consultation

Send a photo of your scar and one of our dedicated scar experts will review and respond within 24 hours if your scar is a good candidate for our system.

Free Consultation ➜
Buy Now